Basic Operations of Sentaurus Workbench
1. Start Sentaurus in workstations by MobaXterm
- The shell commands to open Sentaurus and run the GUI.
mkdir <folder_name>

cd <folder_name>

swb
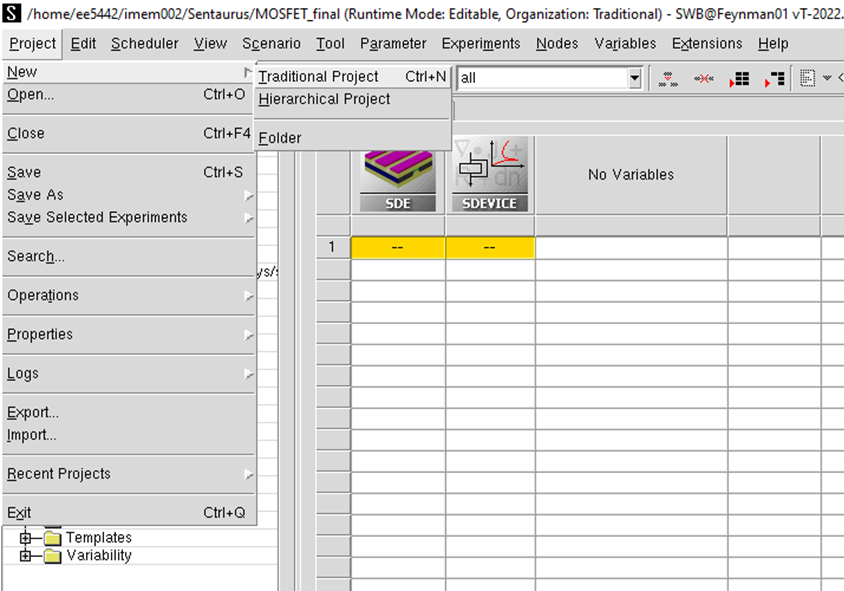
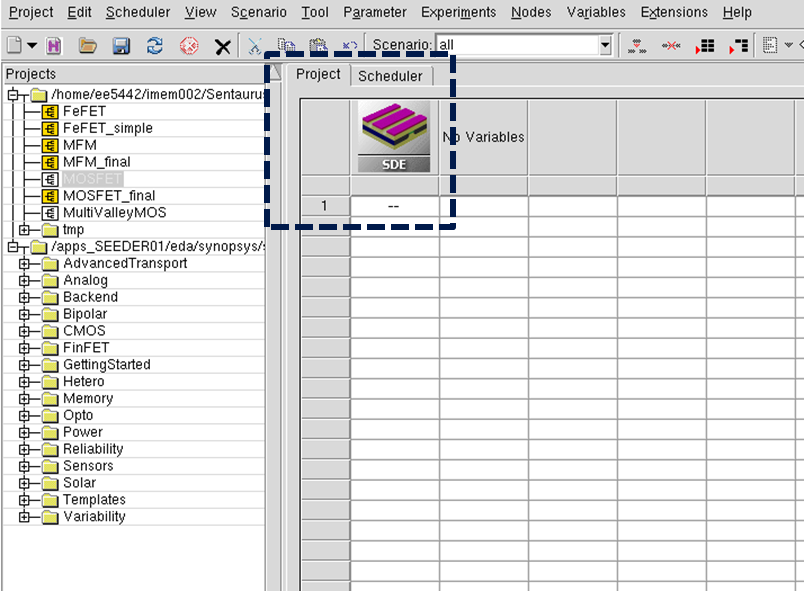
2. Create new project
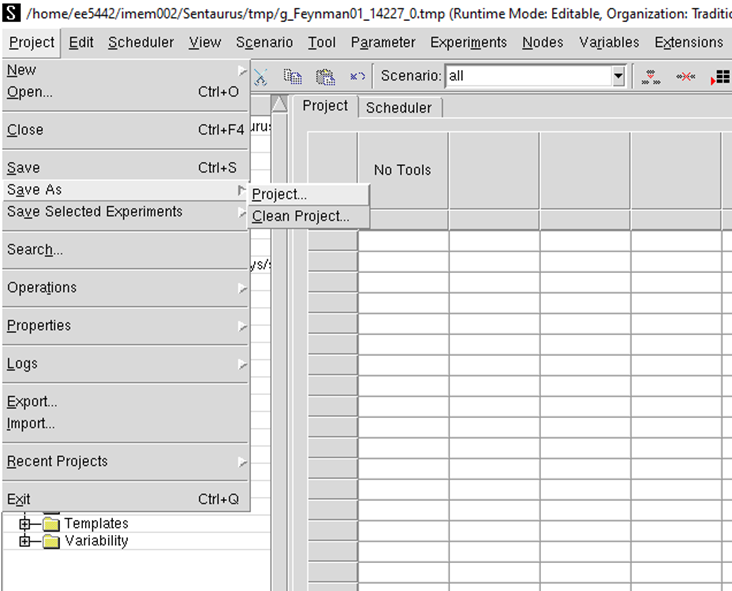
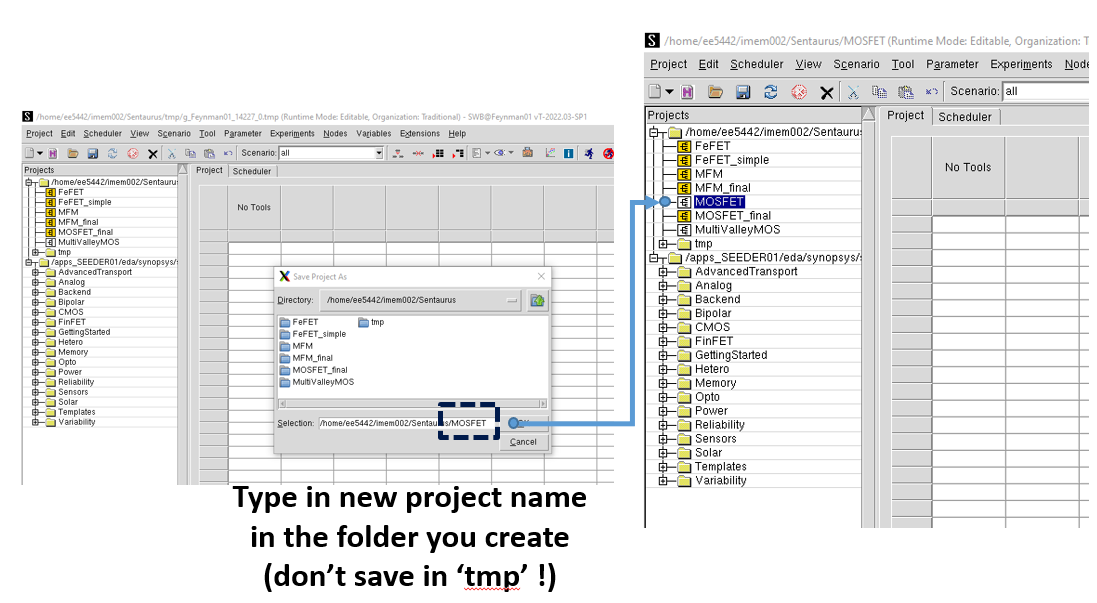
3. Save new project
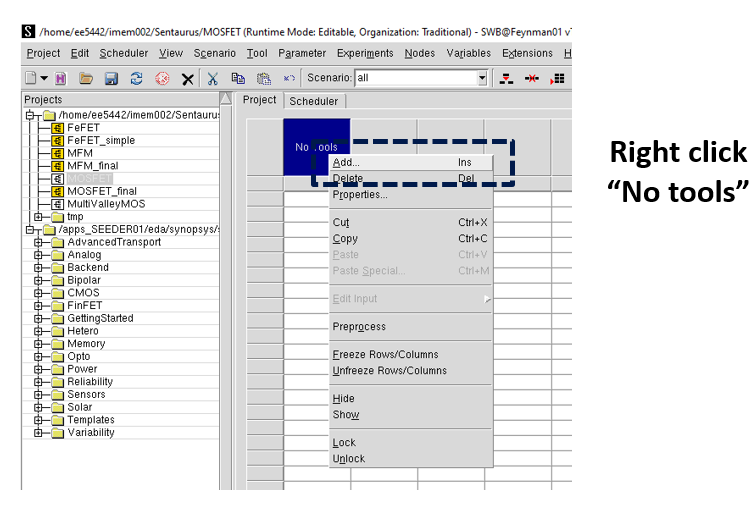
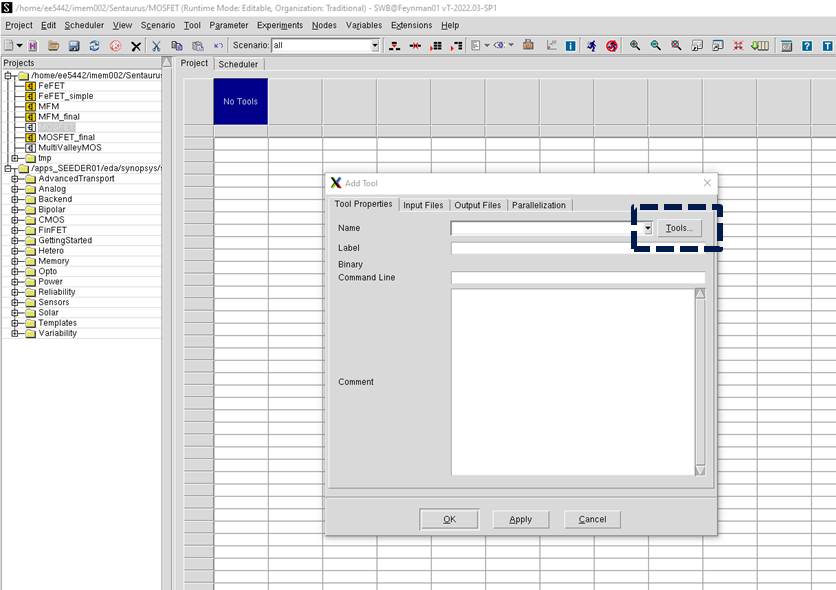
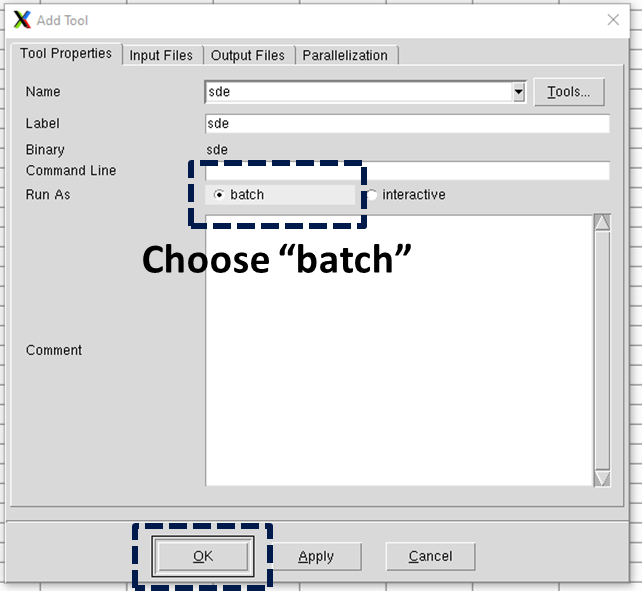
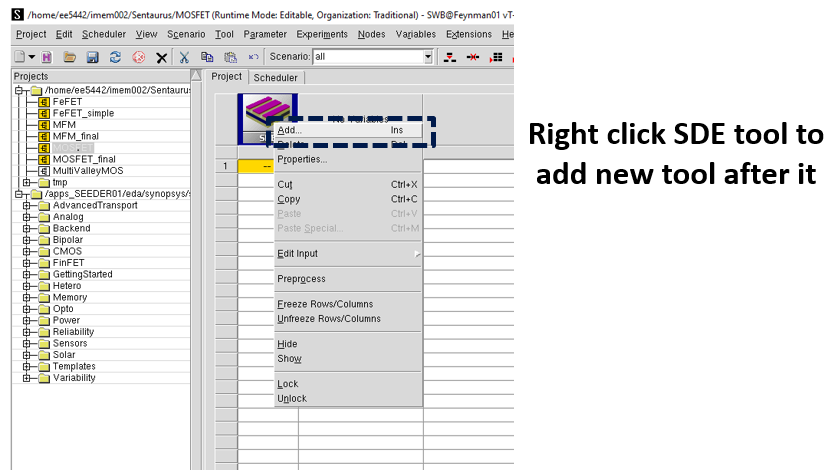
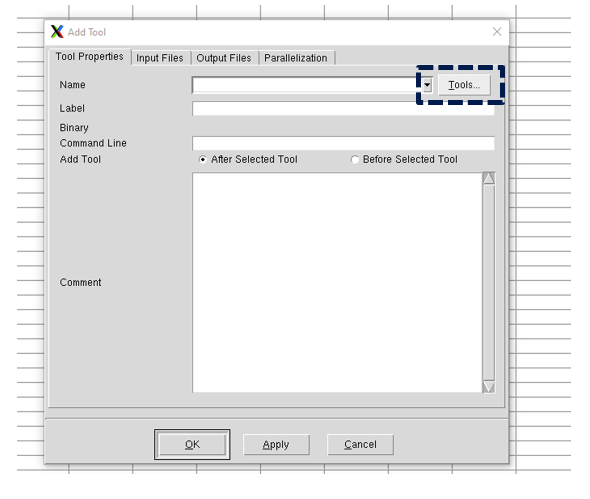
4. Add SDE tool for device structure design

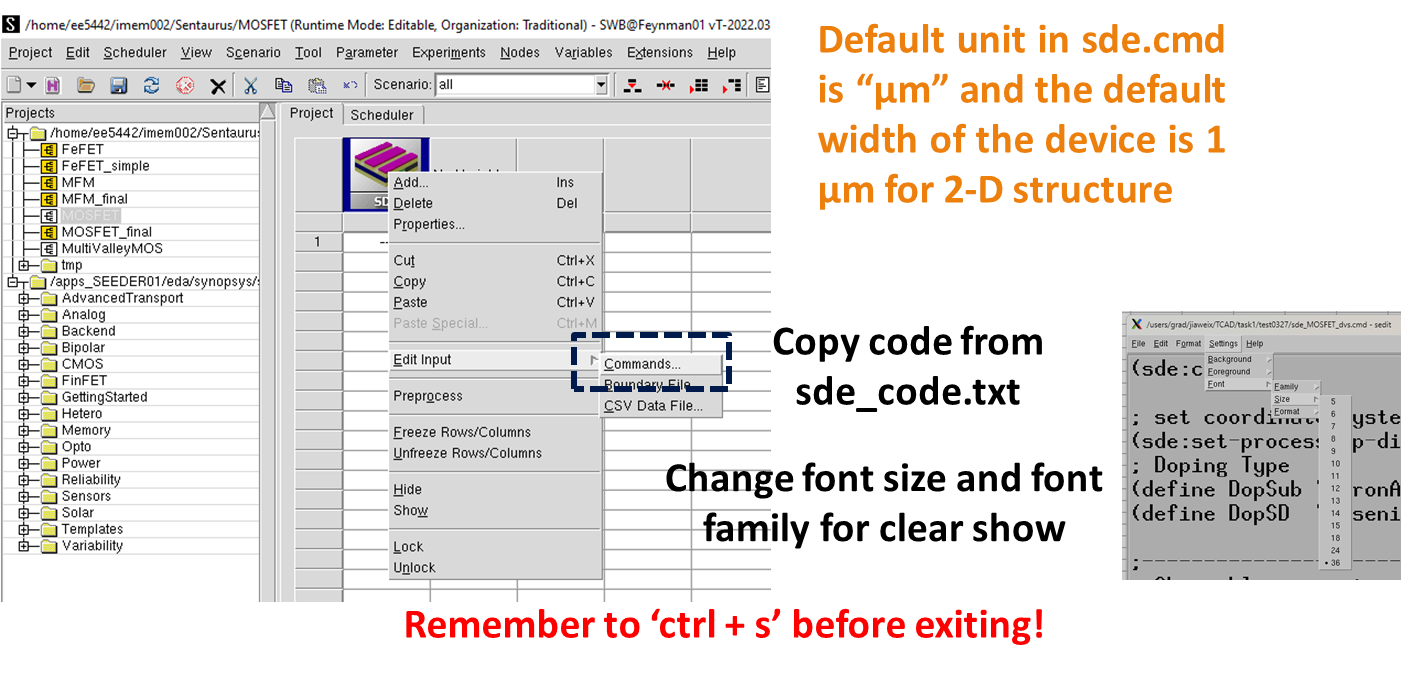
5. Edit sde_des.cmd for device design
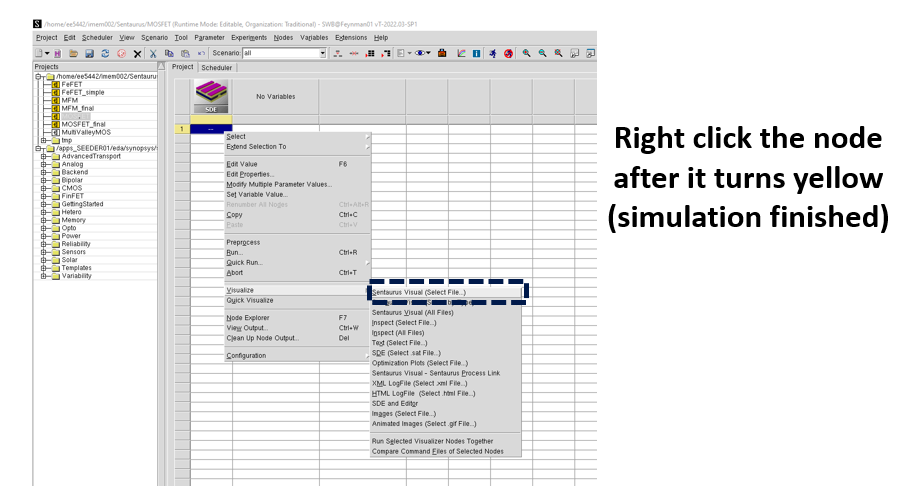
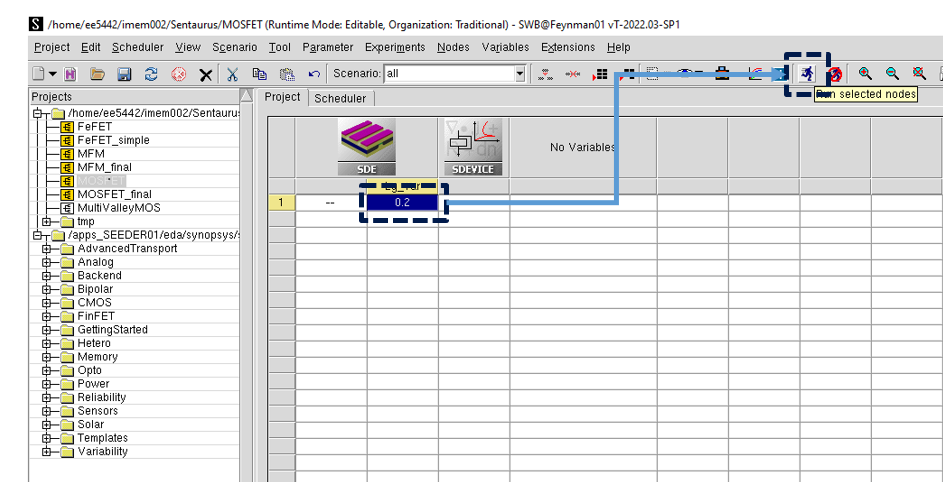
6. Run SDE node

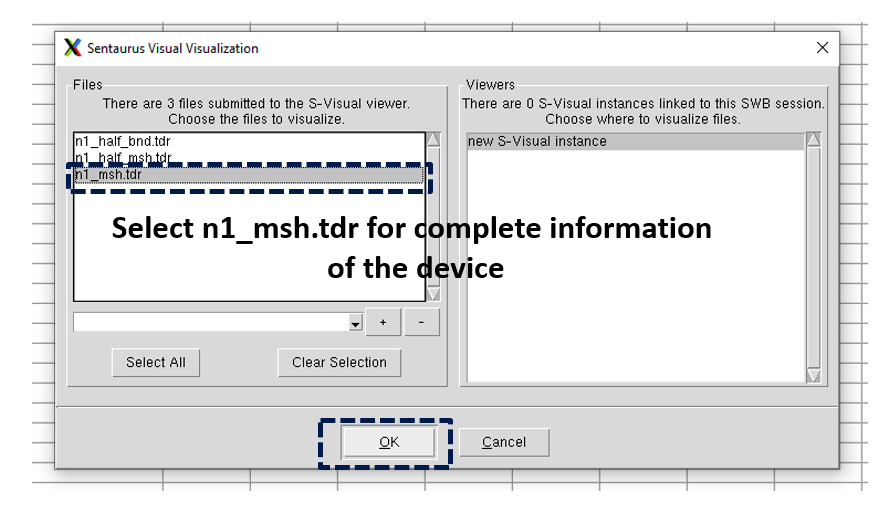
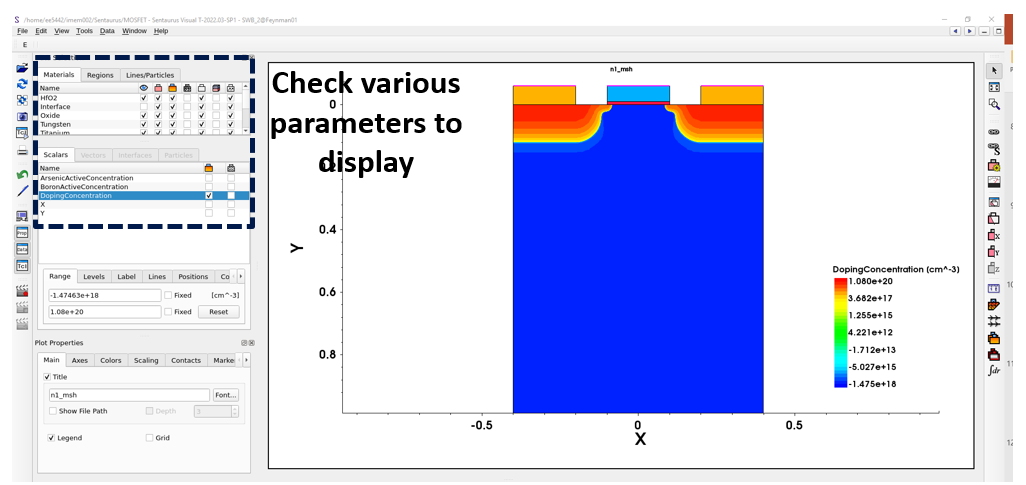
7. Visualize device structure
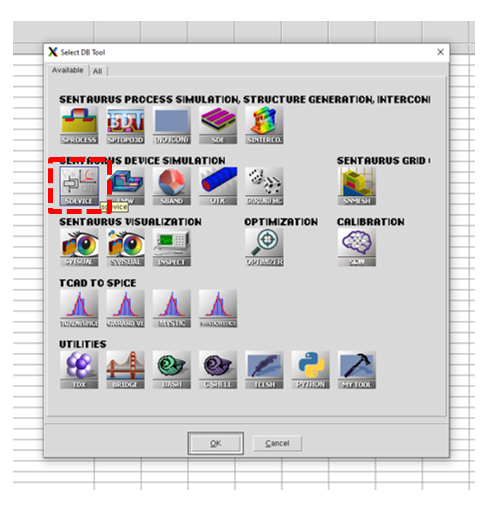
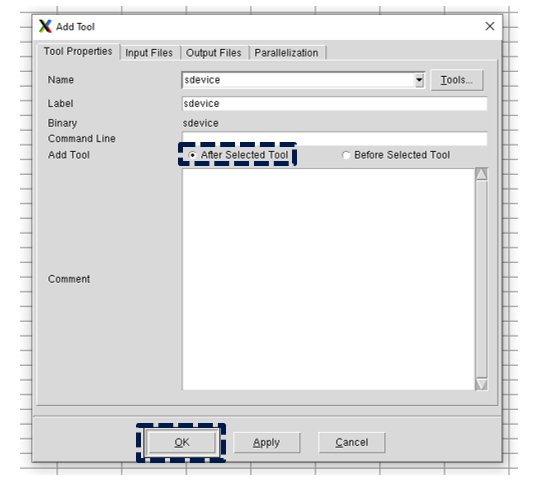
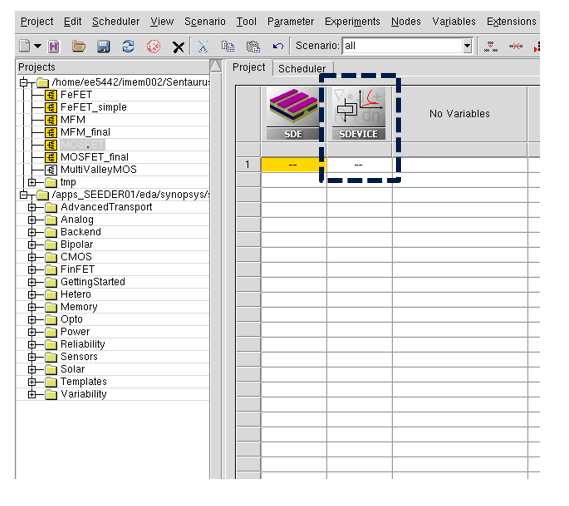
8. Add SDEVICE tool for electrical performance simulation
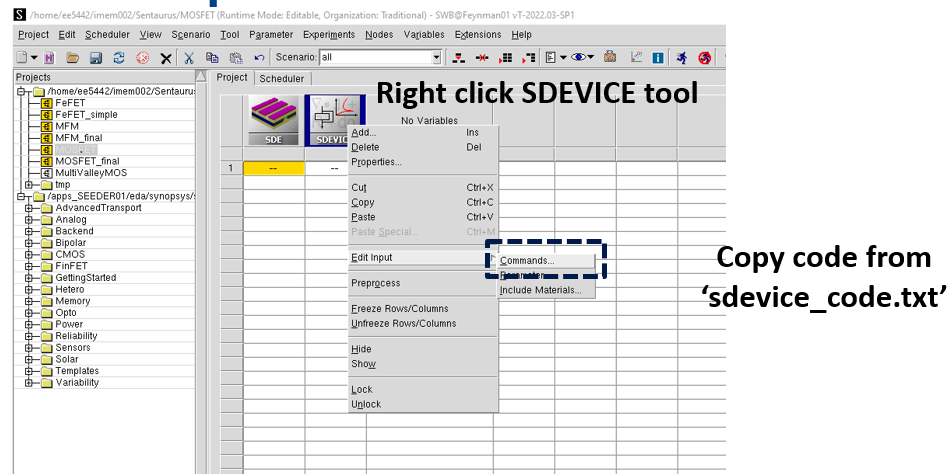
9. Edit sdevice_des.cmd for electrical simulator setup
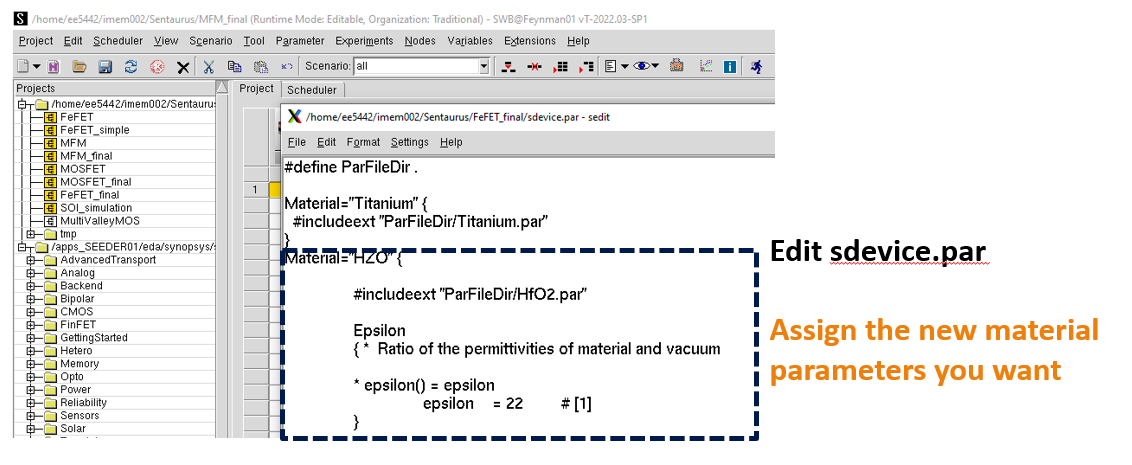
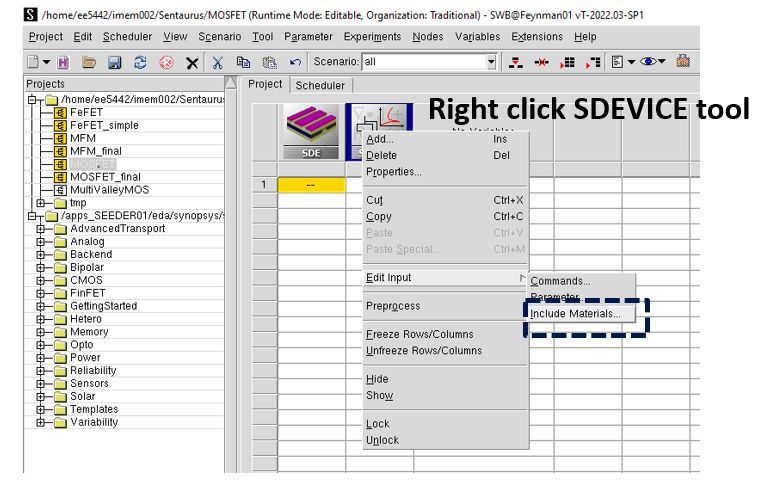
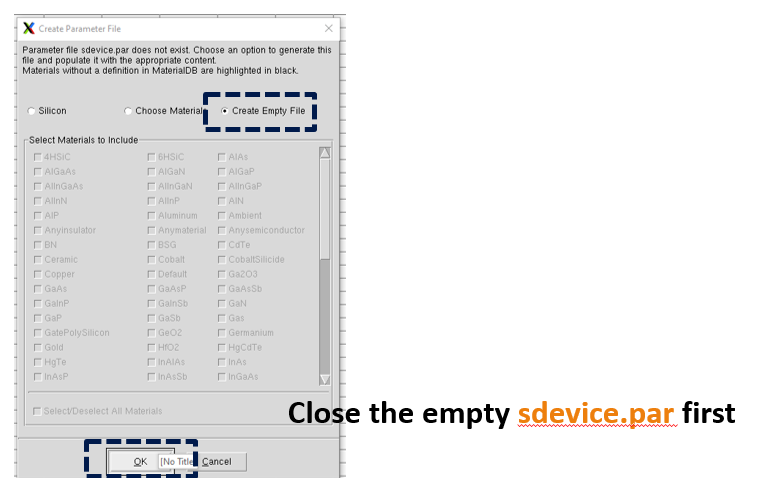
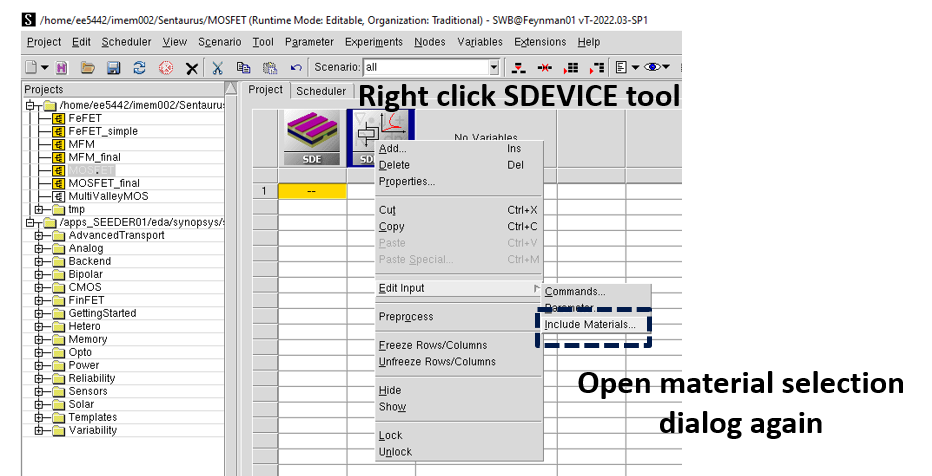
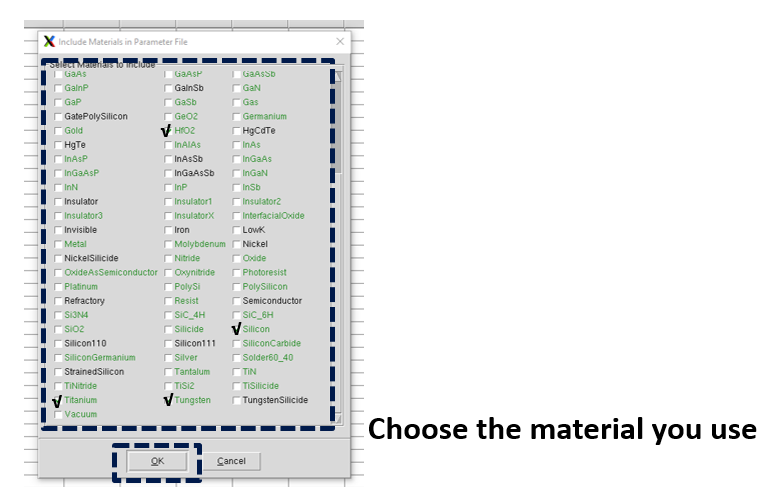
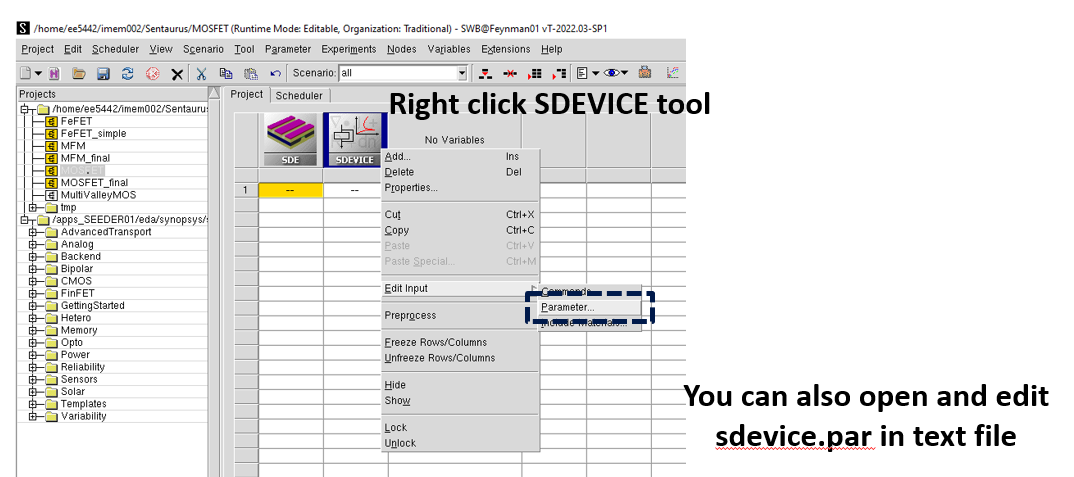
10. Create sdevice.par to define material parameters

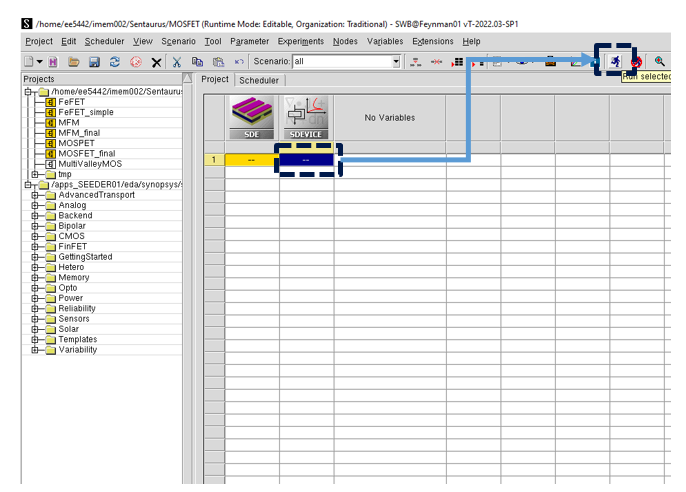
11. Run SDEVICE tool
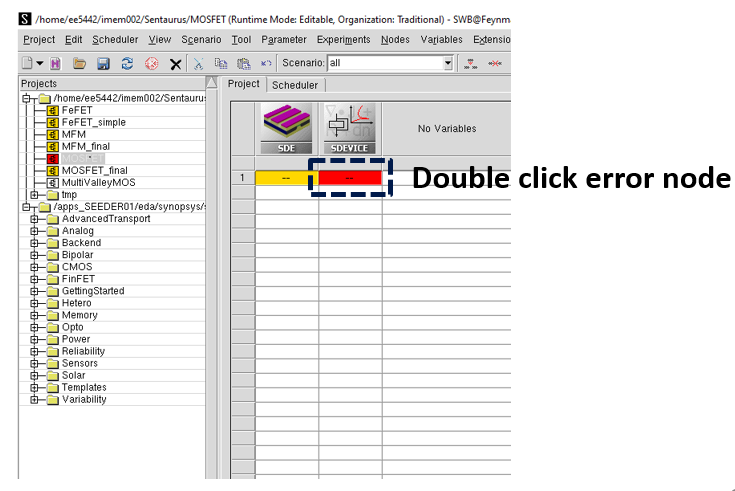
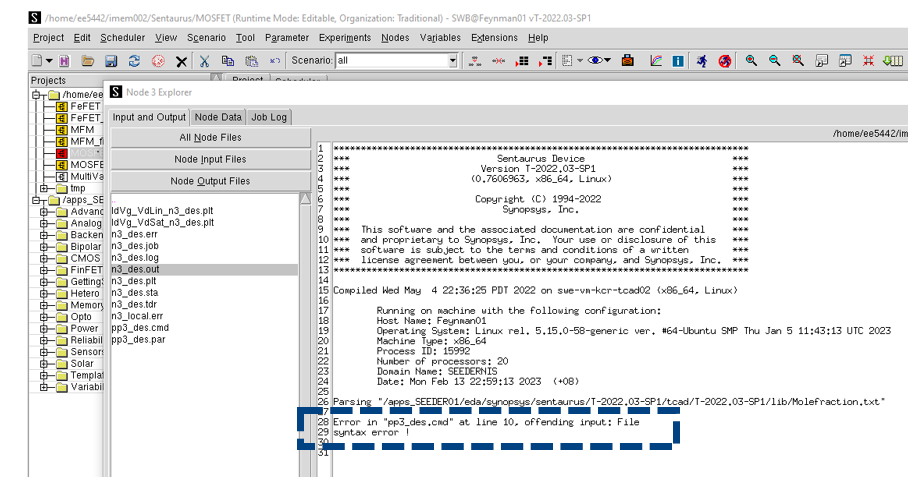
12. Check error message
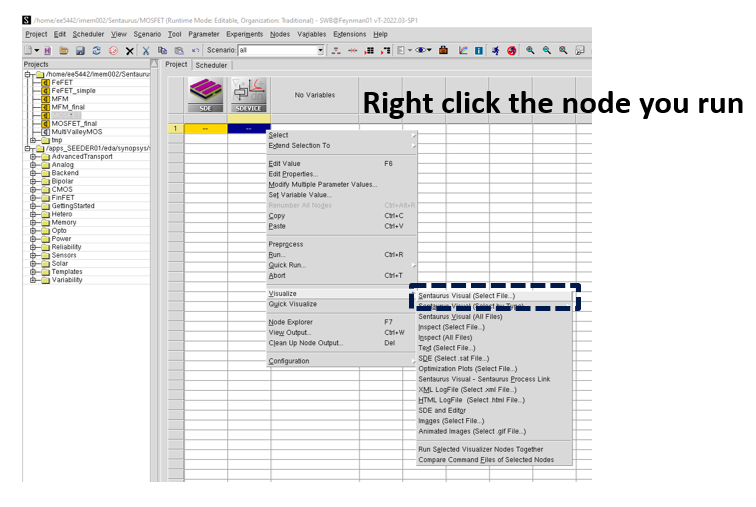
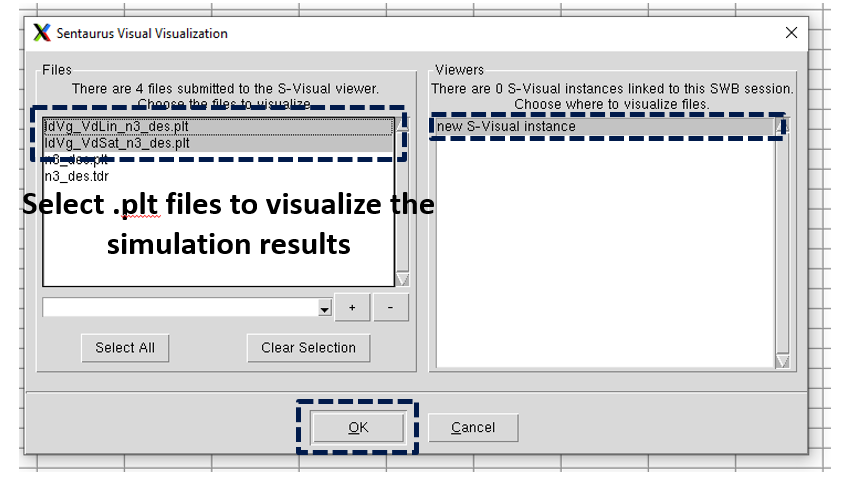
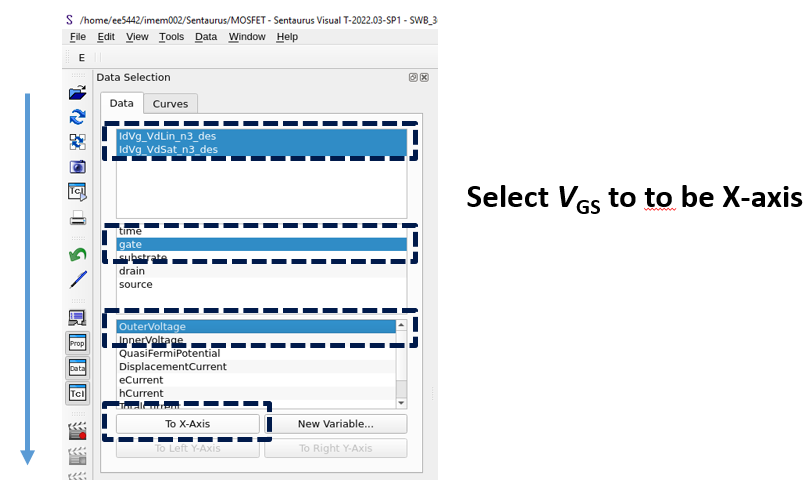
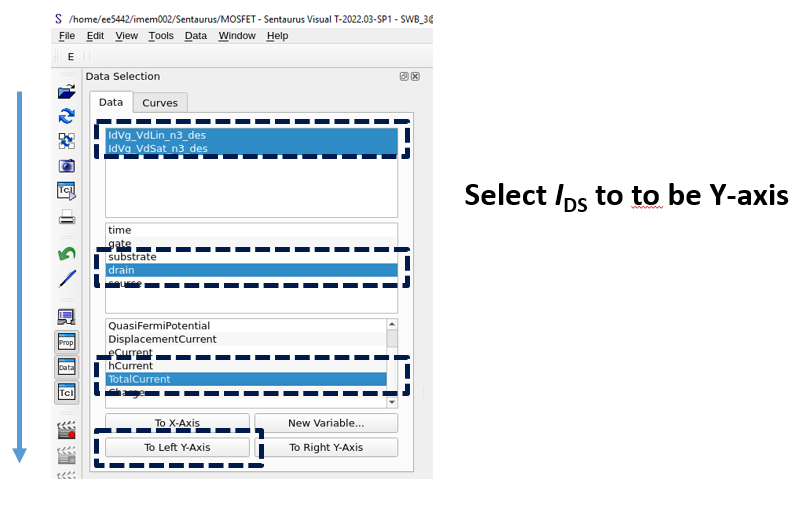
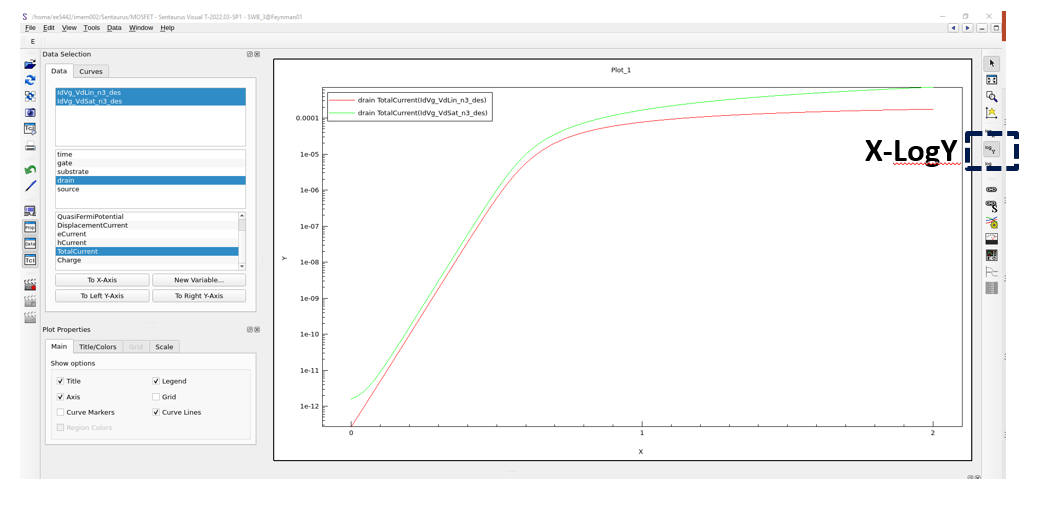
13. Visualize simulated electrical characteristic curves
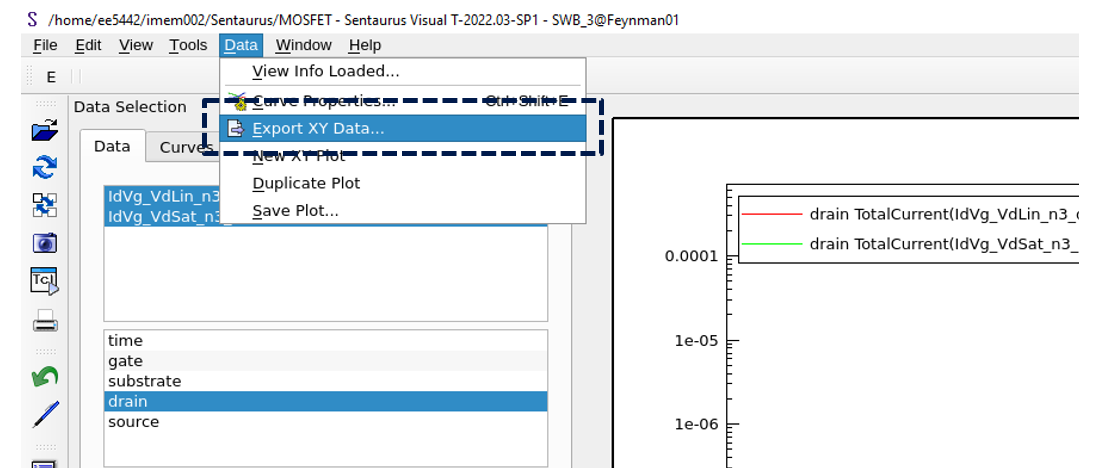
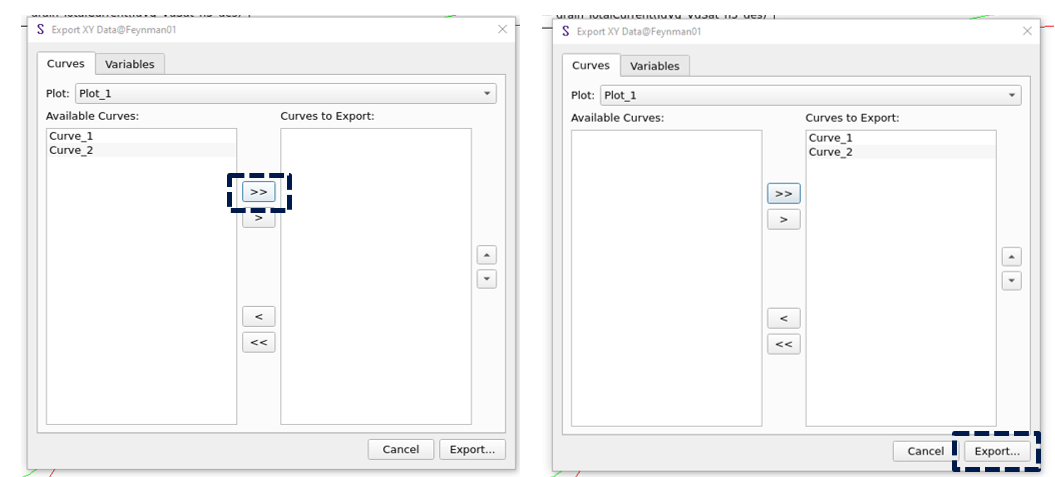
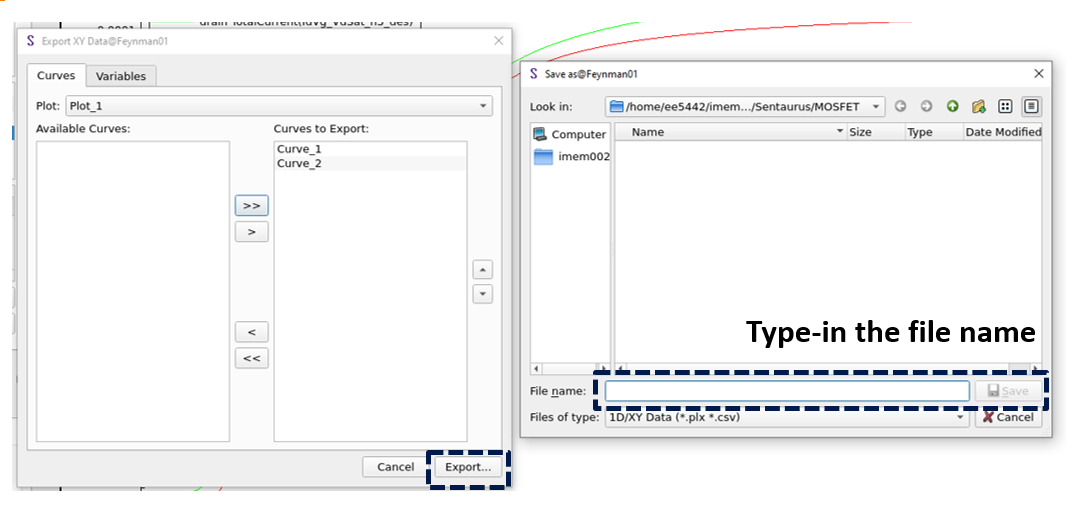
14. Save data to the file
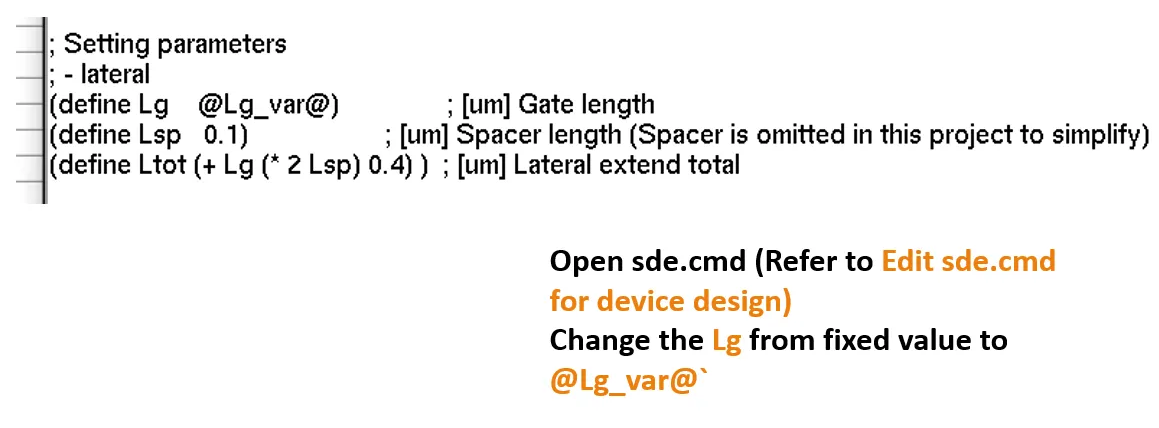
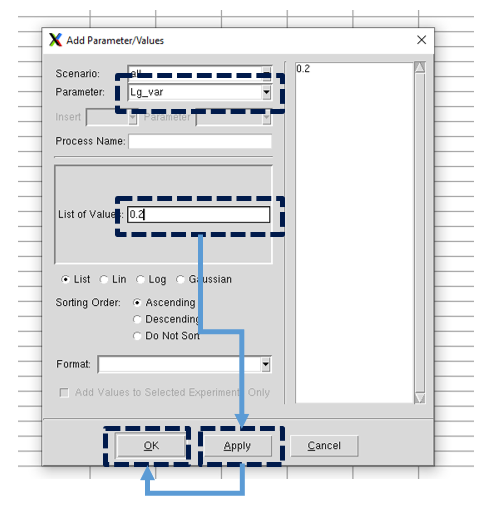
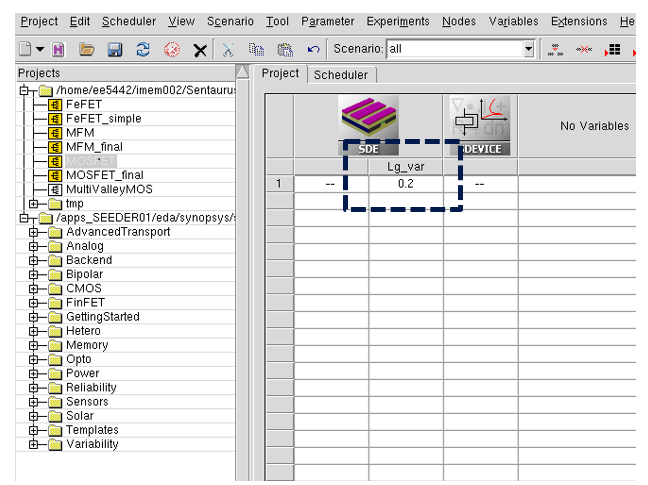
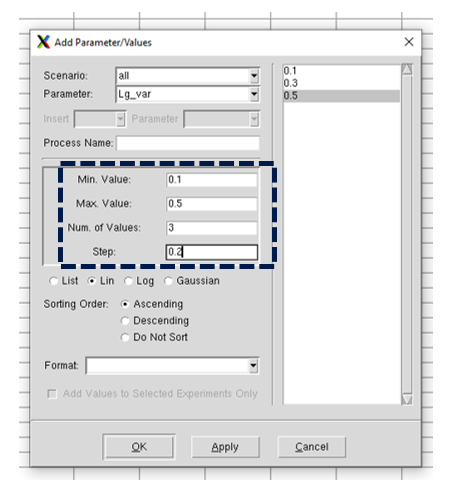
15. Add variables in simulation
- Add variables in cmd file
- Add variables in Sentaurus workbench

16. Add new materials for simulation (HZO)
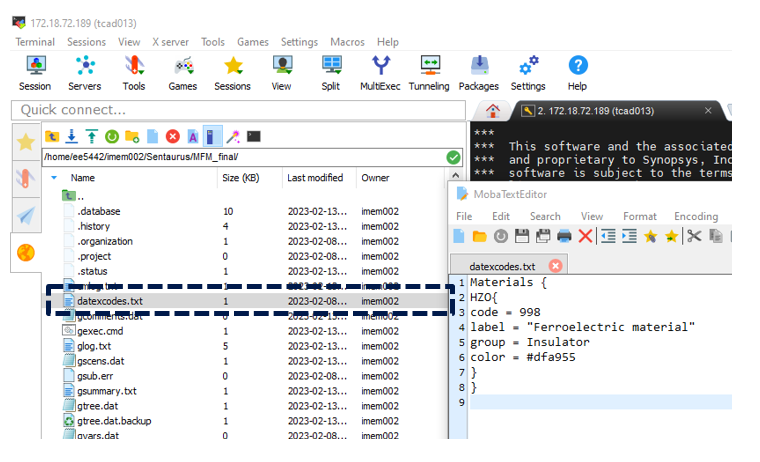
- Create a txt file in the project folder named as “datexcodes.txt” to state the new material.
File content:
Materials {
HZO{
code = 998
label = "Ferroelectric material"
group = Insulator
color = #dfa955
}
}
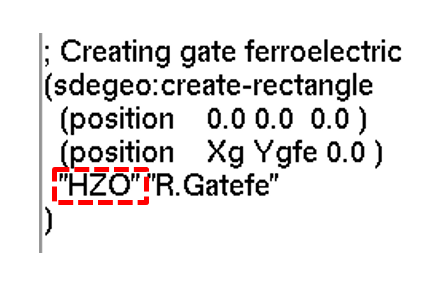
- Edit sde.cmd
- Create a region with the name of the new material.
- Edit sdevice.par